设计之初 -- espresso无源码测试环境搭建
为什么选黑盒测试? 毕竟很多公司UI自动化测试还都仅仅是测试工程师来做的 , 开发的参与度并没有那么高 , 而源码的开放程度也原没有那么理想.
为什么选Espresso? 该框架是 Google 官方提供的一个易于测试 Android UI 的开源框架 , 于2013年10月推出它的 released 版本, 至今以更新到了3.0.2相比之前的 Android UI 自动化测试工具 , 其运行的速度,匹配元素的方式,主线程同步机制 都是首屈一指的 , 另外给 case 编写过程中的调试工作提供了更多的方便.
本系列项目位于github: https://github.com/rawqing/EspressoBlackBoxDemo
环境准备
- Android studio -> Android开发IDE ,当然也是自动化case开发平台
- 一款用于测试的 apk -> 我们用示例项目 Login Activity
知识贮备
- java or kotlin 编程基础
- gradle 基本操作
- 一点点 Android 开发知识
环境搭建
-
准备被测 apk
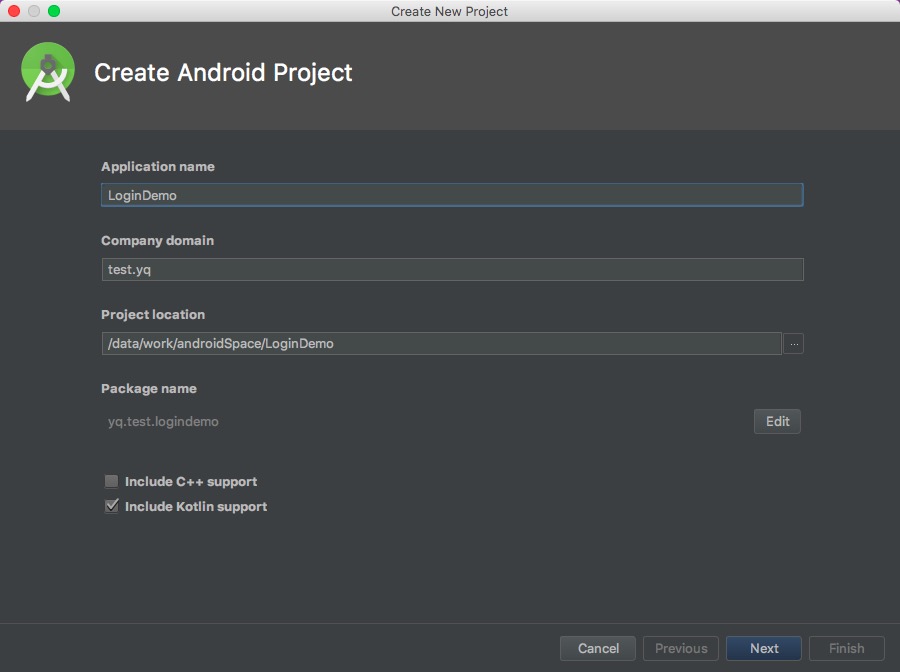
新建项目:
一路Next至实例 Activity 选择:
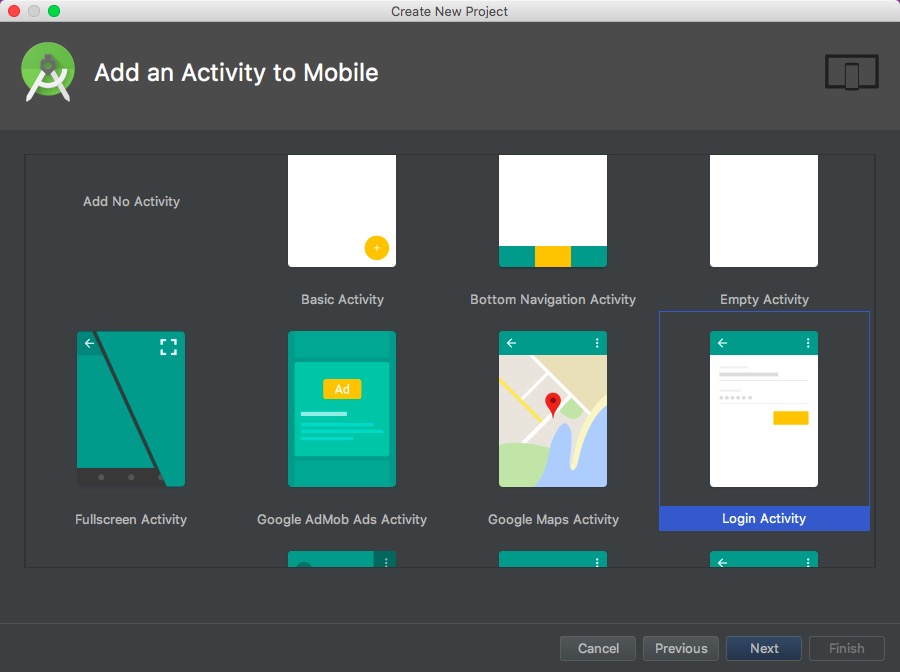
选择 Login Activity -> Next -> Finish
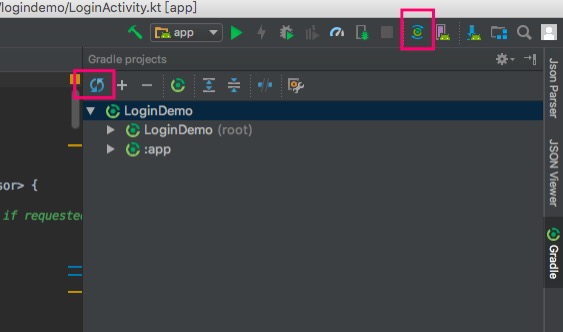
展开右侧的Gradle卡片 , 若没有内容出现则需同步项目:
编译 apk :
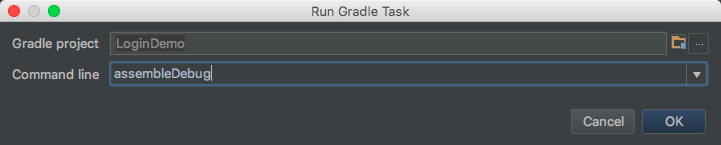
也可直接运行gradle task:assembleDebug
拷贝出app/build/outputs/apk/debug目录下的app-debug.apk文件作为被测 apk 使用 -
创建测试项目
新建项目的过程就不多说了 , 在选择 Activity 的步骤中选择 Add No Activity 即可

来看看项目的目录结构:
我们主要关注如下几个目录和文件:
a.app/src/androidTest测试 case 的存放目录 , 这也是我们工作的主要目录
b.app/libs离线jar/aar包的存放目录
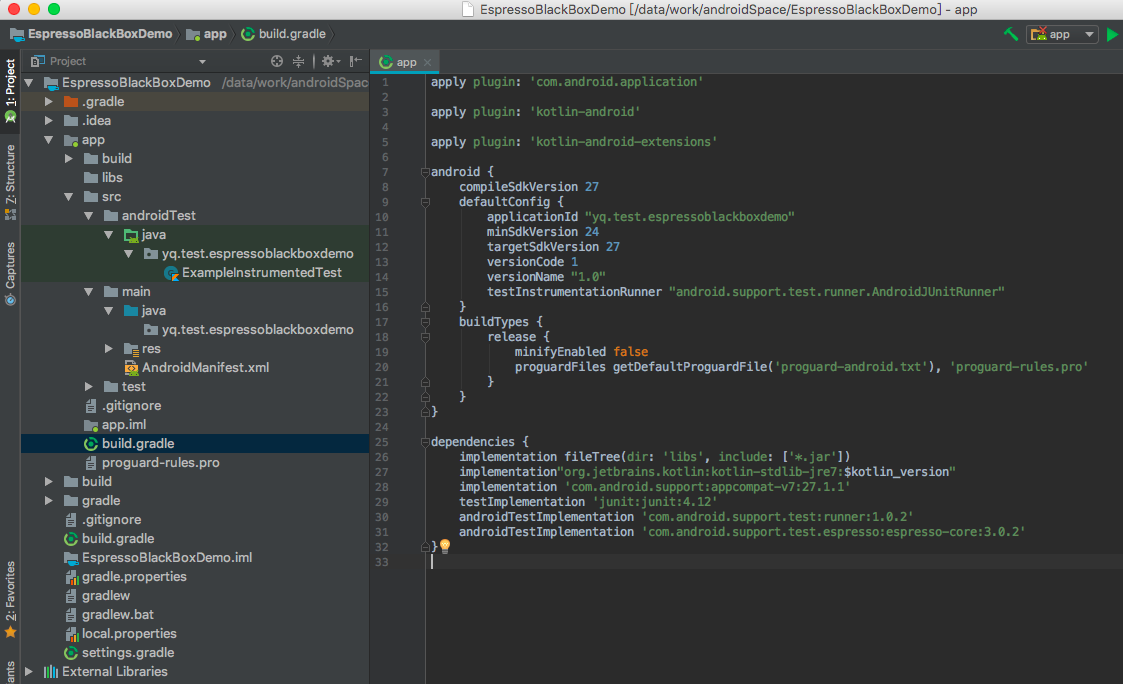
c.app/build.gradle主要的 build 配置, dependencies 设置, plugin 设置文件
d.build.gradle全局环境变量设置, classpath 设置, 全局 projects 设置
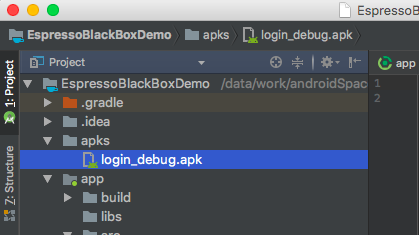
e.settings.gradle一般在多项目依赖,或者 lib 项目依赖时使用 - 添加被测 apk
我们新建一个名为apks的目录来存放被测apk
然后, 编辑app/build.gradle文件 :
a. 修改applicationId与被测 apk 的 applicationId 一致 , 如我们当修改为'yq.test.logindemo'
b. 在文件的末尾加上如下代码:task copyTask(type: Copy) { from '../apks/login_debug.apk' into 'build/outputs/apk/debug/' rename { 'app-debug.apk' } } android.testVariants.all {variant -> variant.assemble.doLast { copyTask.execute() } } - 测试
我们添加一段测试代码来验证一下我们的apk是可测试的
a. 在app/build.gradle中添加dependencies:androidTestImplementation 'com.android.support.test:rules:1.0.2'b. 新建测试类
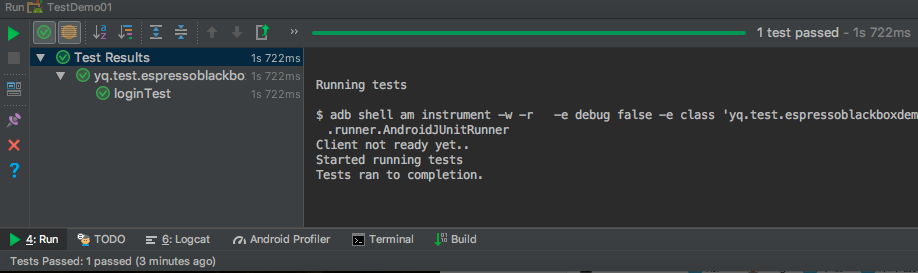
TestDemo01并测试:package yq.test.espressoblackboxdemo; import android.support.test.rule.ActivityTestRule; import android.support.test.runner.AndroidJUnit4; import org.junit.Rule; import org.junit.Test; import org.junit.runner.RunWith; import static android.support.test.espresso.Espresso.onView; import static android.support.test.espresso.action.ViewActions.click; import static android.support.test.espresso.action.ViewActions.replaceText; import static android.support.test.espresso.assertion.ViewAssertions.matches; import static android.support.test.espresso.matcher.RootMatchers.withDecorView; import static android.support.test.espresso.matcher.ViewMatchers.isDisplayed; import static android.support.test.espresso.matcher.ViewMatchers.withResourceName; import static android.support.test.espresso.matcher.ViewMatchers.withText; import static org.hamcrest.core.Is.is; import static org.hamcrest.core.IsNot.not; @RunWith(AndroidJUnit4.class) public class TestDemo01 { @Rule public ActivityTestRule<?> atr = new ActivityTestRule(getFixedClass("yq.test.logindemo.LoginActivity")); private static Class getFixedClass(String name) { try{ return Class.forName(name); }catch (ClassNotFoundException e) { e.printStackTrace(); return null; } } @Test public void loginTest(){ onView(withResourceName("email")).perform(replaceText("hello")); onView(withResourceName("email_sign_in_button")).perform(click()); onView(withText("This email address is invalid")).inRoot(withDecorView(not(is(atr.getActivity().getWindow().getDecorView())))) .check(matches(isDisplayed())); } }就是这样 , 一个黑盒测试的用例就完成了 , 是时候验证我们的成果了:
如果你在怀疑测试准确性 , 那么我们将断言故意改成错误的来试试:
我们将预期字符串改成
"This email address is invalid !",对, 就是多加了 ` !`
再次来看一下运行结果:
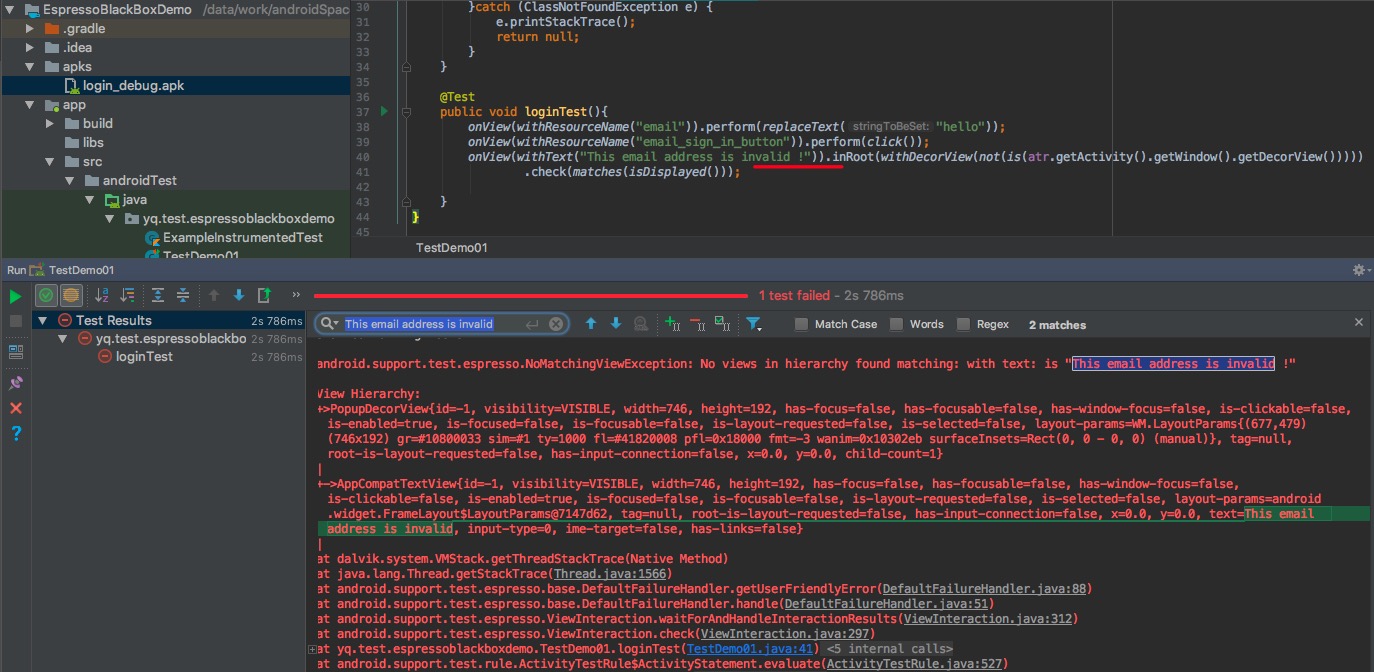
从错误信息中 , 我们不难看出失败的原因 .
总结
整个过程并没有多么困难 . View 的查找方式多样, 如果觉得这样写起来很麻烦 , 那么将 需要二次封装 或者 扩展(kotlin) . 运行的效率是不是令你感到惊叹!
